- Home
- Anti-Slip Product
- Roll-Traction®
Roll-Traction®
Portable Anti-Slip Rolls are a Walkway Solution for Large Areas
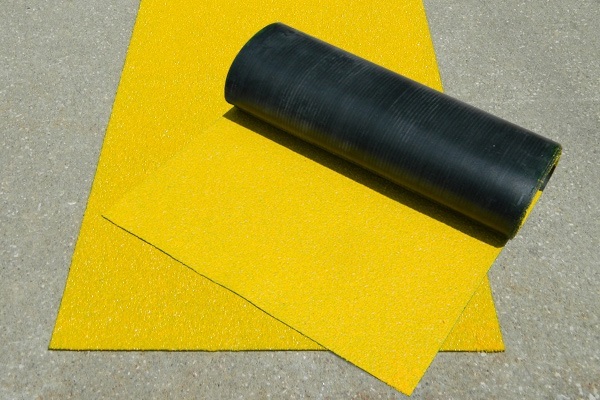
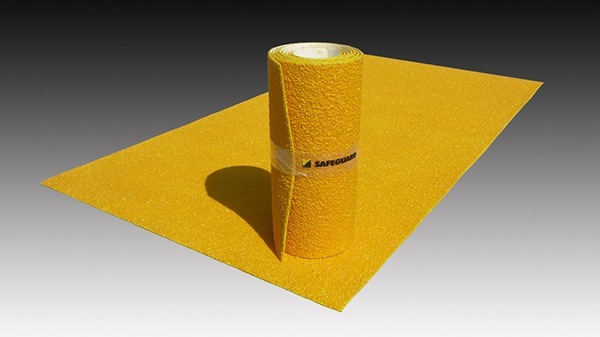
Create a secure anti-slip area quickly by unrolling our heavy-duty, flexible, polymeric geomembrane on walkways, decks, flooring, and more.
Temporary or Permanent Non Slip Rolls
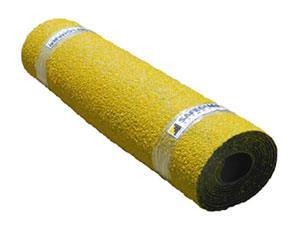
High strength and puncture resistant, you can unroll our anti-slip Roll-Traction covers for temporary installation, then roll up for storage. Or, use fasteners and adhesives for a more permanent solution.
Key Product Features
Exceeds OSHA & ADA Guidelines
Grit to Suit Your Application
Product Specifications
THIS CONTENT IS DYNAMICALLY ADDED WITH JAVASCRIPT.
If you have Javascript turned off, this page won’t load as intended.
THIS CONTENT IS DYNAMICALLY ADDED WITH JAVASCRIPT.
If you have Javascript turned off, this page won’t load as intended.
THIS CONTENT IS DYNAMICALLY ADDED WITH JAVASCRIPT.
If you have Javascript turned off, this page won’t load as intended.
THIS CONTENT IS DYNAMICALLY ADDED WITH JAVASCRIPT.
If you have Javascript turned off, this page won’t load as intended.
THIS CONTENT IS DYNAMICALLY ADDED WITH JAVASCRIPT.
If you have Javascript turned off, this page won’t load as intended.
THIS CONTENT IS DYNAMICALLY ADDED WITH JAVASCRIPT.
If you have Javascript turned off, this page won’t load as intended.
THIS CONTENT IS DYNAMICALLY ADDED WITH JAVASCRIPT.
If you have Javascript turned off, this page won’t load as intended.
THIS CONTENT IS DYNAMICALLY ADDED WITH JAVASCRIPT.
If you have Javascript turned off, this page won’t load as intended.
THIS CONTENT IS DYNAMICALLY ADDED WITH JAVASCRIPT.
If you have Javascript turned off, this page won’t load as intended.
THIS CONTENT IS DYNAMICALLY ADDED WITH JAVASCRIPT.
If you have Javascript turned off, this page won’t load as intended.
THIS CONTENT IS DYNAMICALLY ADDED WITH JAVASCRIPT.
If you have Javascript turned off, this page won’t load as intended.
THIS CONTENT IS DYNAMICALLY ADDED WITH JAVASCRIPT.
If you have Javascript turned off, this page won’t load as intended.
THIS CONTENT IS DYNAMICALLY ADDED WITH JAVASCRIPT.
If you have Javascript turned off, this page won’t load as intended.
Base Materials
High Strength Geomembrane
Base Thickness
0.068 inches (1.72 mm)
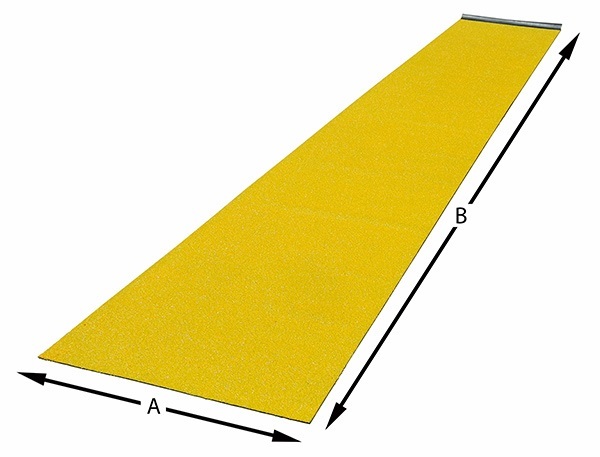
Standard Sizes
| Inches | Meters |
|---|---|
| 29″ (A) 40′ (B) |
0.75 (A) 12 (B) |
| 40″ (A) 30′ (B) |
1 (A) 9 (B) |
| 58″ (A) 20′ (B) |
1.5 (A) 6 (B) |
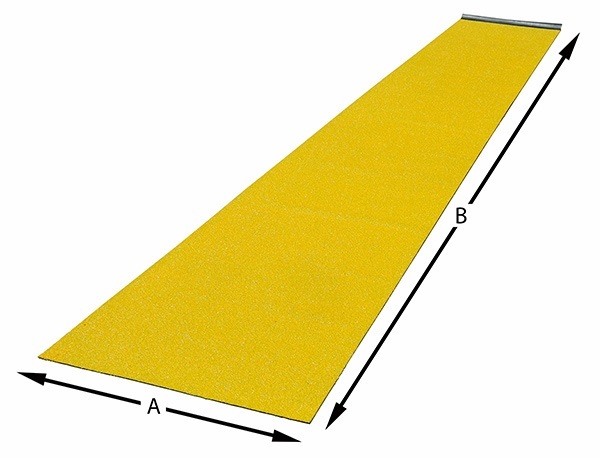
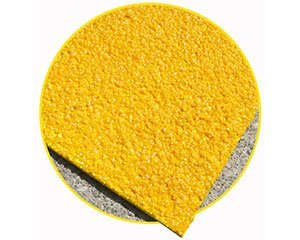
Roll-Traction is available in a range of grit options, depending on your application:
Coarse (Industrial)
Fine (Commercial)
Extra Fine (Residential)
Super Fine (Barefoot)
Not available in Super Coarse (Xtreme™) and Extra Coarse (Offshore) grit.
See Our Quality First Hand – request a free sample of our product below.
Choose grit and thickness to suit your application
| Grade | Average Thickness Inches |
Average Thickness Millimeters |
|---|---|---|
| Coarse | 0.101″ | 2.6 mm |
| Fine | 0.095″ | 2.4 mm |
| Extra Fine | 0.087″ | 2.2 mm |
| Super Fine | 0.080″ | 2.0 mm |
Average Weight: 0.8 lb/sq. foot (3.9 kg/sq. meter) with Coarse grade grit
SAFEGUARD Color Options
The colors on this web page serve only as a visual guide for initial selection of color. Actual finished product color may vary slightly from the version shown on your monitor based on grit size (coarseness) as well as the base material of construction. To see the actual color, please request a product sample.
The ideal place for safety messaging is on the floor where eyes should be focused. Embed warnings, instructions, and more into Roll-Traction covering.

Roll-Traction is custom manufactured in the USA to meet your application requirements. Contact us with any questions. Or, use the buttons below to request a sample or more information about our products. To place an order, please call: 1-800-989-1695.
Choose
- Size (Width/Length)
- Grade/Grit
- Color(s) & Messaging
- Preferred Method of Installation
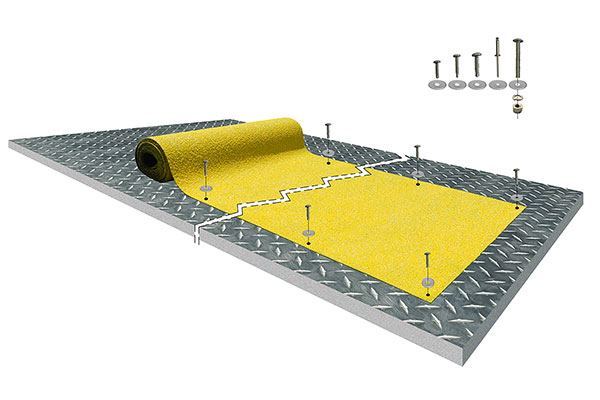
How to Install with Mechanical Fasteners
Walkway Covers over Wood, Steel & Concrete
- Prior to drilling, determine placement of Cover on walkway or landing.
- SAFEGUARD® Covers are available with pre-drilled holes. If your Covers have pre-drilled holes, skip to STEP # 8.
- If your Walkway Cover does not have pre-drilled holes, position one Cover over the substrate and determine the desired location for the screws. There may be impediments that determine where the holes should be drilled: i.e. on wood, there may be spacing between boards.
- Once the position of the drill holes is determined, mark the underside of the Cover with a shop pencil or SharpieTM. Safeguard recommends that pre-drilled holes be at least 1” (25 mm) in from the edge of the Covers to avoid fracturing (FRP).
- Place Walkway Cover so that the bottom side is facing up. Always drill from the underside through to the gritted surface. We suggest using a wood plank underneath for support during the drilling operation.
- Using the appropriate sized drill bit from the Drill Bit Chart (Section 1), pre-drill the holes into the underside of your SAFEGUARD® Cover using the markings you created.
- Re-align your Cover with the pre-drilled holes in the precise position you want the Cover installed.
- (Pilot Holes) – Place a marking device in the predrilled holes and mark the substrate accordingly. If installing your Cover over wood, pilot holes are not necessary. SKIP TO STEP # 13.
- Remove the Walkway Cover.
- Drill the pilot holes to the appropriate depth indicated in the PILOT HOLE DEPTH guide (Section 1).
- Using a brush, broom, or ShopVacTM, remove the dust and debris caused by the drilling.
- If using masonry fasteners, once the surface is clear of dust and debris, insert the plastic sleeve into the pilot hole. The top of the insert sleeve should sit flush with the top of the pilot hole.
- Place the Walkway Cover over the area taking care to align the pre-drilled holes precisely with the pilot holes. If installing over wood or there are no pilot holes, simply align the Cover in the desired location.
- Insert the appropriate screw and torque until a tight fit/seal is achieved.


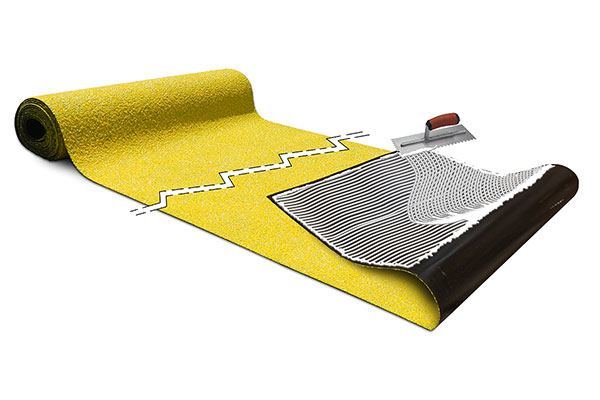
How to Install with Adhesive
Walkway Covers over Wood, Steel & Concrete
- Closely follow the surface preparation instructions for adhesive provided by Safeguard.
- Determine placement of the Cover.
- Using fine grade sandpaper, lightly abrade the underside of the Cover. This will help in promoting the bond with the adhesive.
- Insert the cartridge of SikaFlex 252 into a caulking gun and puncture the seal to initiate flow. Follow instructions on cartridge specifying temperature and cure time.
- Apply a ¼” bead of adhesive to the underside of the Cover, around the entire perimeter, 1-2” in from the edges.
- For large covers, a shaped bead is recommended through the middle of the Cover from corner to corner.
- Position the Cover over the surface in the desired position.
- Firmly push the Cover with adhesive onto the substrate taking care not to slide the Cover.
- To seal the Cover and prevent water from seeping underneath, run a bead of adhesive around the perimeter where the Cover and substrate meet.
How to Install with Mechanical Fasteners and Adhesive
Walkway Covers over Wood, Steel & Concrete
Follow Steps 1-14 for Mechanical Fasteners (above)
- Closely follow the surface preparation instructions for adhesive provided by Safeguard.
- Determine placement of Cover.
- Using fine grade sandpaper, lightly abrade the underside of the Cover. This will help in promoting the bond with the adhesive.
- Insert the cartridge into the caulking gun and puncture the seal to initiate flow. Follow instructions on cartridge specifying temperature and cure time.
- Apply a ¼” bead of adhesive (i.e. – Sikaflex 252) to the underside of the Cover allowing a 1-2” inch bare edge along the perimeter. Do not apply adhesive over the pre-drilled holes.
- For large Covers, an shaped bead is recommended through the middle of the Cover from corner to corner.
- Position the Walkway Cover taking care to align the pre-drilled holes precisely with the pilot holes. Firmly push the Cover with adhesive onto the surface taking care to not slide the Cover or obstruct the drill holes.
- Insert the appropriate screw and torque until a tight fit/seal is achieved.
- To seal the Cover, run a bead around the entire perimeter at the edge of the substrate.


